What’s the information that we can get from the drawings?
As a professional CNC lathe supplier, we always recommend a suitable CNC lathe model with related configuration based on customized drawings of jobs. So what information should be shown on the drawings? Let’s go and learn more about it.
1. Full view of the job
2. Dimension of the job
There are three main types of dimensioning: distance, diameter, and angle.
3. Tolerance
Tolerances are mainly divided into dimensional tolerances and shape tolerances
Dimensional tolerance figure:
Shape tolerance figure:
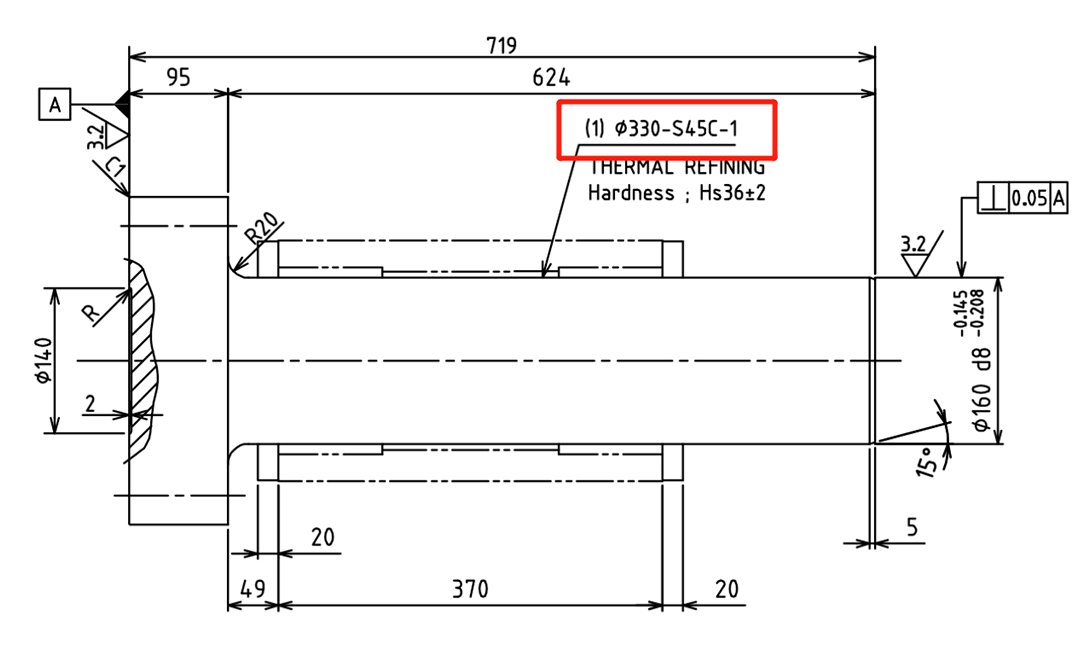
⊥: represents this tolerance class as perpendicularity
0.05: represents this tolerance class as perpendicularity
A: represents the datum feature.
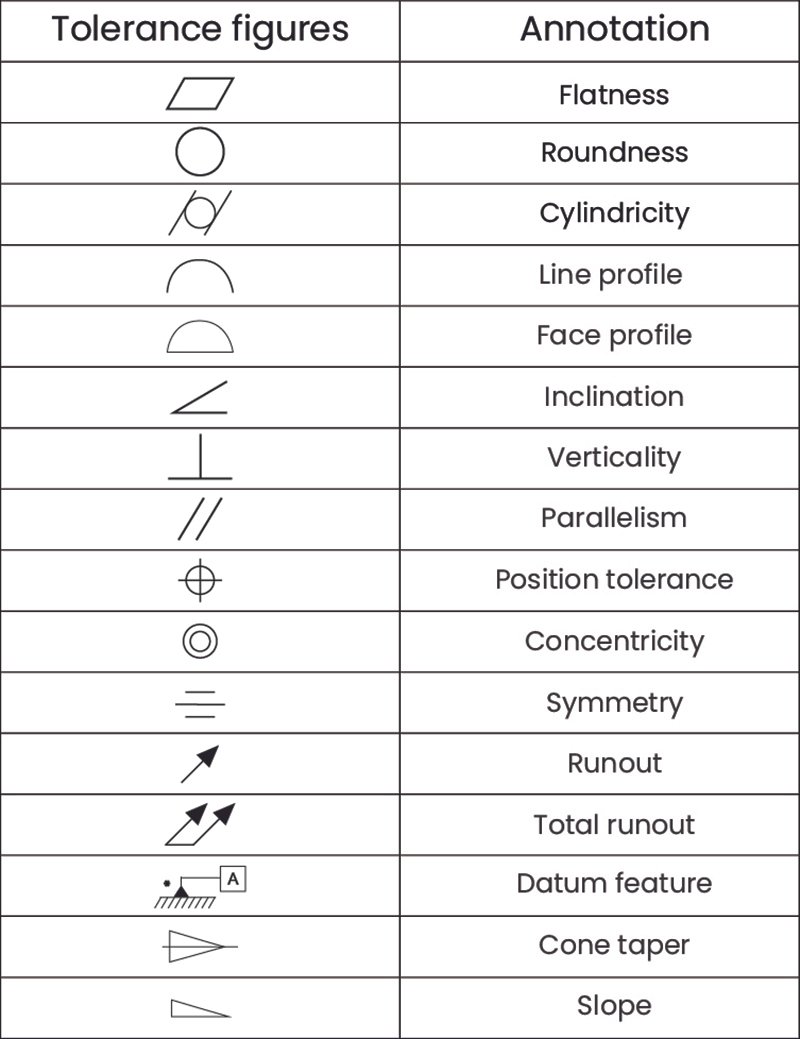
Common Tolerance figures
4. Roundness
Also known as a finish, it defines the roughness of the surface of the job.
Roundness figure:
it means Ra3.2 roundness。
Surface Roughness Level Comparison Table:
Raw material information
General material information will be filled in the frame and may also be marked in the view.
5. Request for special treatments
Such as quenching and tempering, welding, spinning, and other processes, the following figure shows the hardness requirements that require quenching and tempering, and the Shore hardness Hs 36±2.


